When Your Kimchi Keeps Going Wrong and You Can’t Figure Out Why
Picture this: you’ve spent an afternoon salting and rinsing napa cabbage, mixing your gochugaru paste, packing everything tightly into a jar — and three days later you lift the lid to find a fuzzy white bloom creeping across the surface. The whole batch goes in the bin. You try again, this time pressing the cabbage down more carefully and screwing the lid on tight, but now the jar is hissing, the lid has bowed upwards, and brine has leaked all over your fridge shelf. Sound familiar?
The frustrating part is that neither of those batches had anything wrong with the recipe. The problem was the vessel. Standard jar lids seal too tightly, trapping carbon dioxide until the pressure forces its way out — or worse, lets oxygen sneak back in. Kahm yeast and mould thrive in that inconsistent environment. What you actually need is a container that vents gas in one direction only, keeps air out reliably, and holds enough kimchi for a household without taking up your entire worktop. That specific combination — small-batch capacity, a proper airlock, and UK-available options — is exactly what this guide addresses.
How This Guide Was Put Together
Evaluating fermentation vessels isn’t as straightforward as testing a kitchen gadget with a single use. Kimchi fermentation runs across days or weeks, and the performance of a seal only becomes obvious when something goes wrong. To build this guide, the evaluation drew on verified buyer feedback patterns from UK and international reviewers, published food-science principles around anaerobic lacto-fermentation, and a review of available products across several vessel categories — jar-top airlock lids, dedicated kimchi containers, and classic water-trap airlocks.
The key criteria used were: quality of the anaerobic seal (does it reliably keep oxygen out?), CO2 venting mechanism (passive silicone valve, water trap, or vacuum press?), capacity suitability for small batches (roughly 0.5–5 litres), ease of cleaning, odour and stain resistance, UK availability, and honest value for money. Tradeoffs are called out plainly — nothing here is ranked by how impressive its marketing copy sounds.
Quick Picks at a Glance
| Best for… | Price range | Key feature |
|---|---|---|
| Absolute beginners who want zero fuss | £10–£20 | Silicone one-way valve sits directly on a wide-mouth jar — no water to top up |
| Canning jar owners who want a trusted upgrade | £10–£18 | Rigid built-in airlock lid designed for standard wide-mouth glass jars |
| First-timers wanting a complete starter kit | £15–£25 | All-in-one kit with airlock lids, pump, and fermentation weights included |
| Serious kimchi makers scaling up to fridge batches | £20–£35 | Dedicated Korean-style container with inner vacuum press lid and large capacity |
| Budget-conscious batch fermenters running multiple jars | £5–£10 | Classic three-piece water-trap airlock — drills into any standard lid |
| Year-round fermenters who want durable, low-profile hardware | £15–£25 | Heavy-duty silicone grommet lid with high-capacity CO2 venting for active ferments |
Best for Beginners: Silicone One-Way Valve Airlock Lids
If you’ve never fermented anything before and you want results without a learning curve, silicone one-way valve lids are the place to start. These are flat, low-profile discs — usually sold in packs of four to six — that replace the standard metal lid on any wide-mouth mason or Kilner jar. The silicone is formed into a micro-valve at the centre that flexes open under CO2 pressure and snaps back shut the moment gas stops flowing. Oxygen cannot push it open from the outside, so your kimchi stays in a reliably anaerobic environment throughout the ferment.
The biggest practical advantage is that there is no water reservoir to maintain. Traditional water-trap airlocks require periodic top-ups because the water evaporates, especially in a warm kitchen. Leave one dry for a few days and you’ve lost your seal. Silicone valves have none of that overhead. Pack your jar, screw the lid on, put it somewhere between 18–22°C, and check it in 48 hours. That’s genuinely it. They also sit low enough to fit on a fridge shelf without modification, which matters once you move the kimchi to the cold for slow ageing.
What to look for: food-grade silicone (not PVC), compatibility with 70mm or 86mm wide-mouth jar rims (check your jars before buying), and a design that allows you to remove the valve for cleaning. Some cheaper versions are moulded in a single piece that traps brine residue — avoid those. Look for a valve that disassembles into two parts so you can wash the inside of the micro-channel. Dishwasher-safe is a bonus but hand-washing in hot soapy water is fine.
The honest tradeoff: silicone valves offer no visual feedback. You can’t see bubbles moving through water to confirm active fermentation, which can feel disconcerting for newcomers. Your kimchi is almost certainly fermenting — the smell and taste will confirm it — but if you’re the type who finds it reassuring to watch bubbles, consider a water-trap design instead. These valves also work best on jars 500ml to 1.5 litres; very large jars generate so much CO2 in the first 24 hours that you want a more robust venting system.
Best Trusted Upgrade: Rigid Built-In Airlock Lid for Wide-Mouth Jars
If you already own a collection of wide-mouth preserving or canning jars and want to upgrade them for fermentation without buying new vessels, a rigid built-in airlock lid is the most sensible path. These lids are typically made from BPA-free plastic with a small, self-contained airlock mechanism moulded directly into the top. The airlock usually takes the form of a miniature water-trap chamber that is filled through a port — a design derived from homebrew beer-making but scaled down for food jars.
What makes this type appealing over basic silicone valves is the seal integrity around the jar rim. A rigid lid with a proper rubber gasket grips a mason jar thread more securely than a flexible disc, particularly on jars that have been used and washed many times and whose rims may have very slight warping. The firmer mechanical seal gives confidence on longer ferments — kimchi left for three weeks or more — where even a tiny air leak over time can invite contamination.
Look for lids that include a coloured date-marker dial on the top surface. These let you set the day you started the batch without needing separate labels, which is genuinely useful when you have three or four jars going at different stages. The airlock chamber should hold at least 10–15ml of water so it doesn’t need daily topping-up. Avoid designs where the water port is positioned right at the edge of the lid — these are prone to tipping and spilling when you pick the jar up.
The tradeoff here is height. A rigid airlock lid adds 4–6cm to the top of your jar, so standard pantry or fridge shelf spacing may become tight. Measure before you buy. Also, the water chamber introduces one more thing to clean, and the small bore of the port can be fiddly to rinse. A bottle brush with a fine tip or a pipe cleaner solves that. These lids also work best when the jar is kept upright — if your fridge has any tilt, brine can travel up into the airlock and cause a messy overflow.
Best Starter Kit: All-in-One Airlock Lid and Weights Bundle
For anyone who wants to get fermentation right on the first attempt rather than troubleshooting why their second or third batch went wrong, an all-in-one kit removes the most common failure points in one purchase. The best versions of these kits include airlock lids that fit standard wide-mouth jars, a hand pump for extracting residual air before sealing, and — critically — glass or food-safe plastic weights for keeping the cabbage submerged beneath the brine.
That last component is worth dwelling on. Submerging the vegetable matter is the single most important physical action in kimchi fermentation. Any piece of cabbage poking above the brine line is exposed to oxygen and will develop mould within 24–48 hours in a warm kitchen. Beginner fermenters routinely pack their jars, seal them, and then discover the top layer of kimchi has risen above the brine as CO2 forms during the first fermentation cycle. A weighted disc sitting on top of the vegetables eliminates that problem entirely.
The pump included in quality kits is used after packing the jar to draw out as much oxygen as possible before the lacto-bacteria begin producing CO2. It’s not strictly necessary once you understand fermentation — the bacteria will outcompete any residual oxygen fairly quickly — but for a first batch where confidence matters, it’s a reassuring step. Some kits include a tamping tool for compressing the kimchi paste down firmly during packing, which is another genuine quality-of-life addition.
What to avoid: kits where the weights are made from low-grade plastic that absorbs gochugaru pigment permanently. Glass weights are heavier and more fragile but they don’t stain, don’t scratch, and don’t introduce any off-flavours over time. Also check that the lids included in the kit fit your existing jars — most are designed for 70mm wide-mouth openings, but some Korean recipes use straight-sided Weck or Le Parfait jars with different rim diameters. The pump is generally universal, but the lids are not.
The main limitation of kit-based systems is that you’re buying into a specific lid design. If the lids crack or wear out after two or three seasons, you need to source the same brand again rather than simply grabbing any compatible replacement. Keep this in mind when budgeting — it’s worth spending a little more on a kit from a brand with a clear UK-accessible supply chain.
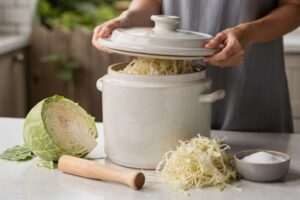
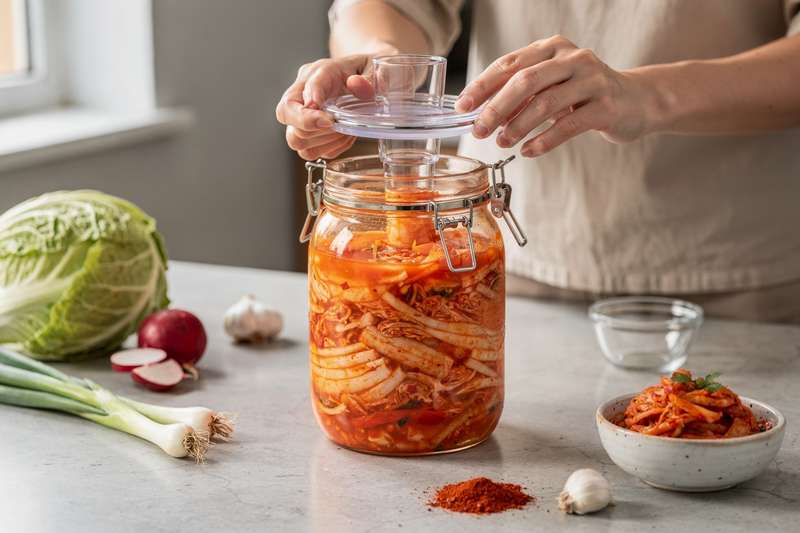
Best for Scaling Up: Dedicated Korean-Style Kimchi Container
There’s a point in any fermentation hobby where the mason jar approach starts to feel like a workaround rather than a solution. When you’re making enough kimchi to last a family through a cold northern English winter, juggling six individual jars — each needing its airlock checked and its contents weighted — gets tedious fast. A dedicated kimchi container, designed in South Korea specifically for this purpose, is the answer to that problem.
These containers use a fundamentally different approach to the anaerobic seal. Rather than venting CO2 through a valve or water trap, they use an inner lid — a flat disc that sits directly on the surface of the kimchi inside the container — combined with an outer lid that locks down firmly over the top. The inner lid presses down under its own weight (sometimes with a small vacuum-assist mechanism), forcing air out of the surface layer and keeping the kimchi compressed beneath it. This creates an extremely effective oxygen barrier without any external plumbing.
Look for containers made from BPA-free, food-grade polypropylene with a matte or rough inner surface finish rather than high-gloss. High-gloss inner surfaces hold on to gochugaru staining more aggressively. Capacity matters: for a household of two to four people, a container in the 2–4 litre range handles a standard-sized kimchi batch comfortably with room to allow for expansion during initial fermentation. The 5-litre-plus options are best reserved for people who genuinely make 4kg+ batches in one go.
These containers are designed to go directly into the fridge after the initial room-temperature ferment (usually 1–2 days on the counter), and they do the slow cold fermentation stage beautifully — the inner lid continues to press down as the kimchi compresses and releases more liquid over weeks. The outer lid seal is tight enough that kimchi odour doesn’t escape into the rest of your fridge, which your flatmates or family will appreciate considerably.
The honest limitation: these containers are not a replacement for an airlock during the active early ferment. During the first 24–48 hours at room temperature, CO2 production is vigorous enough that you need to burp the container (briefly lifting the outer lid) twice daily to release pressure, or leave the outer lid slightly ajar. Once the initial bubble activity slows and you move the container to the fridge, this is no longer necessary. If you forget to burp during active fermentation, the outer lid can pop or warp. It’s a simple routine to get into, but it’s worth knowing upfront.
Best Budget Option: Classic Three-Piece Water-Trap Airlock
The three-piece water-trap airlock has been used by homebrewers since before most modern fermentation enthusiasts were born, and it works exactly as well as it ever did. The design is beautifully simple: a small plastic chamber divided into two or three sections, filled with a centimetre or two of water. CO2 bubbles up through the water and out into the atmosphere. Oxygen cannot travel back down through the water against the rising gas pressure. Fit it into a drilled stopper or a grommet pressed into a jar lid, and you have a reliable one-way valve for under £2 per unit.
For anyone running multiple jars simultaneously — a common approach when you want different kimchi varieties fermenting at the same time — the economics are compelling. A pack of ten three-piece airlocks costs less than a single set of premium silicone valve lids, and they fit any standard jar once you have a suitable stopper or a lid with a pre-drilled grommet hole. Replacement parts are available from any homebrew supplier, and the design is so universal that you’re never locked into a specific brand.
The visual feedback is also genuinely useful. When you see bubbles moving through the water chamber, you know fermentation is actively happening. New fermenters often find this reassuring during the anxious first 24 hours when they’re wondering whether anything is happening at all. The speed of bubbling also gives you a rough sense of fermentation rate — fast and vigorous in the first couple of days, slowing to occasional pops as the bacteria work through the available sugars.
Where this design falls short: the water in the chamber evaporates, particularly in a warm or dry kitchen, and an empty water chamber is no barrier at all. Check the level every two to three days and top up with clean water. The plastic components are also taller than silicone alternatives — typically 7–10cm when assembled — so they won’t fit under low pantry shelves without the jar being repositioned. Some cheaper versions are made from brittle plastic that cracks if over-tightened into a grommet; look for units made from thicker, slightly flexible polypropylene rather than the rigid, slightly cloudy plastic used in the cheapest packs.
One practical note: three-piece airlocks require a compatible lid to fit into. You can buy purpose-drilled fermentation lids with a grommet already installed, or you can drill your own standard metal canning lid and press in a silicone grommet yourself. The DIY route is cheaper and perfectly functional, but the pre-drilled option saves time and the risk of cracking a lid with an improperly sized drill bit.
Best for Year-Round Fermenters: Heavy-Duty Silicone Grommet Lid System
There’s a category of fermentation enthusiast who approaches the whole process with the same rigour they’d apply to homebrewing or bread-making: consistent results, minimal variation between batches, and equipment that holds up to weekly use for years rather than months. For that person, a well-engineered lid system with a heavy-duty silicone grommet and a properly sized three-piece or S-shaped airlock is worth the premium over basic valve lids or disposable grommets.
The key differentiator in quality systems of this type is the grommet. Cheap grommets are stamped from thin silicone that degrades quickly in contact with acidic brine vapour, losing elasticity and allowing air leaks within a season. A well-made grommet is thick, firm, and grips both the lid hole and the airlock stem tightly enough that you can pick the jar up by the lid without anything shifting. It should also be removable for cleaning — grommets that are bonded into the lid permanently cannot be properly sanitised.
The lid itself matters too. Look for lids made from BPA-free HDPE or similar food-safe rigid plastic rather than repurposed metal canning lids, which can rust around the drilled hole over time. Some manufacturers offer lids specifically designed for fermentation that include a wider grommet hole positioned centrally, a date-tracking dial, and a gasket that creates a proper food-safe seal around the jar rim without over-tightening. These details matter across hundreds of fermentation cycles.
This type of system pairs particularly well with half-gallon (approximately 1.9 litre) wide-mouth glass jars, which are the sweet spot for small-batch kimchi — large enough for a meaningful quantity, small enough to fit on a fridge shelf and handle comfortably. If you’re making kimchi every two to three weeks year-round, as many serious fermenters do, the durability of the components becomes the primary consideration rather than upfront cost.
The tradeoff versus silicone valve lids is maintenance — you’re back to monitoring water levels in the airlock. But for fermenters who already check on their jars regularly anyway, this is no hardship. The greater CO2 venting capacity of a properly sized three-piece airlock also makes this system better suited to vigorous, fast ferments in a warm kitchen where a small silicone valve might struggle to keep up with gas production in the first 24 hours.
What to Look For When Buying a Fermentation Jar with Airlock
- Anaerobic seal reliability: The entire point of an airlock is maintaining one-way gas flow. Test any lid by pressing gently on a dry, sealed jar — you should feel resistance. If air escapes easily around the rim, the gasket is inadequate. For water-trap airlocks, check that the water chambers are deep enough (at least 8–10mm of water depth) to prevent oxygen from being drawn back through the water during temperature fluctuations.
- Capacity matched to your batch size: Most household kimchi recipes start with half a head of napa cabbage (around 800g–1kg raw weight), which reduces to roughly 700–900ml of packed kimchi. A 1-litre jar is the minimum for this; a 1.5-litre jar gives you the headspace needed to prevent brine overflow during active fermentation. If you regularly double recipes, look at 2-litre vessels or dedicated kimchi containers in the 3–5 litre range.
- Material quality and odour resistance: Kimchi is aggressive — gochugaru pigment stains, garlic odour permeates, and the acidity of a mature ferment is substantial. Glass jars are the best choice for the vessel itself because they don’t absorb any of this. If you’re using plastic containers, look for polypropylene (PP, marked with recycling code 5) rather than PET or PS, which are less resistant to acidic foods and odour absorption.
- Cleaning access: Fermentation vessels need to be thoroughly cleaned between batches. Any lid or airlock with internal chambers that can’t be fully disassembled for washing is a contamination risk. Silicone valves should separate into at least two parts; water-trap airlocks should disassemble completely; grommet holes should be wide enough to pass a thin brush through.
- Fermentation weight compatibility: Keeping vegetable matter submerged beneath the brine is as important as the airlock itself. Check whether your chosen jar accepts available weights — most 70mm wide-mouth jars are compatible with standard glass fermentation weights, but some imported jars have slightly different rim diameters. Alternatively, a small zip-lock bag filled with brine placed on top of the kimchi works as a DIY weight in a pinch.
- UK availability and spare parts: Fermentation lids and airlocks are small, easily lost, and periodically need replacing. Prioritise products with reliable UK stock — either directly on Amazon UK or through UK homebrew and preserving suppliers. A system that requires importing parts from the US every time a grommet splits is more hassle than it’s worth.
- Temperature range suitability: Kimchi fermentation typically starts at room temperature (18–22°C) and then continues in the fridge (2–5°C). Your seal needs to remain effective across this range. Silicone handles thermal cycling better than rigid plastic; check product descriptions for stated operating temperature ranges if you plan to move jars between environments frequently.
Comparison at a Glance
| Pick | Vessel type | Approx. capacity | Water maintenance required? | Visual fermentation feedback? | Best batch frequency |
|---|---|---|---|---|---|
| Silicone one-way valve lids | Fits wide-mouth mason/Kilner jar | 0.5–1.5 litres per jar | No | No | Occasional to regular |
| Rigid built-in airlock lid | Fits wide-mouth canning jar | 0.5–2 litres per jar | Yes (small chamber) | Yes | Regular |
| All-in-one kit with weights and pump | Fits wide-mouth mason jar; weights included | 0.5–2 litres per jar | Depends on airlock type | Sometimes | Beginners; occasional |
| Dedicated Korean-style kimchi container | Standalone polypropylene vessel | 1.3–7 litres | No (press-lid system) | No | Weekly to monthly large batches |
| Three-piece water-trap airlock | Fits any jar with drilled/grommet lid | Any size jar | Yes (every 2–3 days) | Yes — bubbles visible | High-volume, budget batch fermenting |
| Heavy-duty grommet lid system | Fits wide-mouth glass jars | 0.5–2 litres per jar | Yes | Yes | Year-round, frequent batches |
Verdict: Which One Should You Buy?
For most UK readers making kimchi at home — a batch every few weeks, working with 1–2 jars at a time, and wanting results they can trust without constant monitoring — silicone one-way valve lids are the pick. They’re the simplest to use correctly, they require no maintenance during the ferment, they store flat in a drawer, and they genuinely work. The absence of visual bubble feedback is a minor psychological adjustment, not a practical problem. A 1.5-litre wide-mouth glass jar (Kilner or a good equivalent) paired with a set of silicone valve lids and a glass fermentation weight covers every aspect of small-batch kimchi without any faff.
If you’re already making large quantities — a kilo or more of cabbage at a time, several times a month — step up to a dedicated Korean-style kimchi container in the 3–4 litre range. The press-lid system is specifically designed for kimchi storage, the seal is excellent once initial fermentation has calmed, and it takes up far less fridge space than four individual jars. Remember to burp it during the first two days at room temperature and you’ll have no problems.
The all-in-one starter kit is the right call for anyone who genuinely has no fermentation equipment at all and wants to make one purchase. After that first season, you’ll know which elements of the system you actually use and can invest selectively from there.
This guide was produced independently. No manufacturer or retailer paid to be featured, and no products were provided for review. All assessments are based on publicly available specifications, verified buyer feedback patterns, and established food-science principles around lacto-fermentation. Prices referenced are indicative and subject to change.
FAQ
Do I actually need an airlock for kimchi, or can I just use a regular jar lid?
You can use a regular jar lid, but it requires more active management. A tight lid traps CO2 and needs to be burped (briefly opened) twice daily during active fermentation to prevent pressure build-up, and even careful burping lets oxygen in briefly each time. An airlock handles CO2 venting passively and keeps oxygen out continuously — it reduces the risk of mould and means you don’t need to babysit the jar. For consistent results with minimal effort, an airlock is worth the small additional cost.
What size jar is best for a standard kimchi recipe?
Most home recipes start with half a napa cabbage, which yields roughly 700–900ml of packed kimchi. A 1-litre jar is the practical minimum — it gives just enough headspace to prevent brine overflow during the first vigorous 24 hours of fermentation. A 1.5-litre jar is more forgiving and is the size most experienced home fermenters settle on for single-batch kimchi. If you regularly double or triple recipes, consider a 3-litre dedicated kimchi container instead.
How long should I leave kimchi to ferment at room temperature before refrigerating?
In a UK kitchen at around 18–21°C, one to two days at room temperature is the standard starting point before moving the jar to the fridge. Taste it after 24 hours — if it’s lightly tangy and still quite crunchy, it’s ready to slow down in the fridge. If you prefer a more sour, deeply fermented kimchi, leave it at room temperature for up to three days before refrigerating. In summer, when kitchens are warmer, the process speeds up noticeably, so err on the side of checking sooner.
Why does mould keep forming on top of my kimchi?
Surface mould — or the fuzz-free white film called kahm yeast — almost always indicates that some cabbage or other solid matter is sitting above the brine line and exposed to oxygen. The fix is consistent submersion: a fermentation weight or a brine-filled bag placed on top of the kimchi before sealing keeps everything beneath the liquid. A poorly sealed or absent airlock is the other common cause, allowing oxygen to slowly infiltrate the headspace above the brine. Check your seal and make sure any exposed vegetables are pressed firmly down before closing.
Can I use a Kilner (Le Parfait or clip-top) jar for kimchi fermentation?
Yes, but with a caveat. Clip-top jars with rubber gaskets do allow a small amount of CO2 to escape through the gasket under pressure — some fermenters use them deliberately for this reason. However, they’re not a true one-way valve, and once fermentation slows and internal pressure drops, oxygen can be drawn back in through that same gasket. For a ferment lasting more than a week, a proper airlock lid is more reliable. If you want to use a Kilner jar, fit a drilled stopper with a three-piece airlock rather than relying on the original clip-top seal.
How do I clean a fermentation jar to prevent contamination between batches?
Wash the jar and all components in hot soapy water immediately after emptying — dried kimchi residue is significantly harder to remove than fresh. For the jar itself, a wash in hot water followed by a brief rinse with a diluted white vinegar solution (one part vinegar, four parts water) is sufficient for most purposes. Airlocks and silicone valves should be fully disassembled and soaked for 15 minutes in that same vinegar solution, then rinsed and air-dried completely before storage. Avoid using bleach-based cleaners — any residue can interfere with the lacto-bacteria in your next batch.